RSS

How to have common tiles for each user in Windows 8

Currently, there is no way each user on a Windows 8 machine can have the exact same tiles appear. Well, not any way that I can see.

Windows 8

But I have found a work around.

So far, all I have found that is a possible solution is to have one user that has the correct icons on the Start Screen – in this case the Administrator – and then manually copy the following files to the default user appdata folder:

%LocalAppData%\Microsoft\Windows\appsFolder.itemdata-ms
%LocalAppData%\Microsoft\Windows\appsFolder.itemdata-ms.bak

I then made these files read-only. This prevents the user from unpinning the tiles. They can unpin them in their current session but when they log back on, the tiles are restored to their rightful place.

My next experiment will be to add a copy command to the start for each user to copy the latest revision of these files across each time they log in – just in case I add more programs onto the PC. Stay tuned….
 
Leave a comment

Posted by on June 6, 2013 in Windows 8


Tags:

What is Bitcoin?

I have heard recently about this currency called Bitcoin and my first thought was WTF? Then I thought it was only for use on the Internet. But I was wrong. Thousands of brick and mortar establishments accept Bitcoin.

So what is Bitcoin? Watch the video below and you will discover how cool Bitcoin really is.

 
Leave a comment

Posted by on February 20, 2013 in Bitcoin


Tags:

Unable to boot from CD/DVD on HP 4540s ProBook Laptop

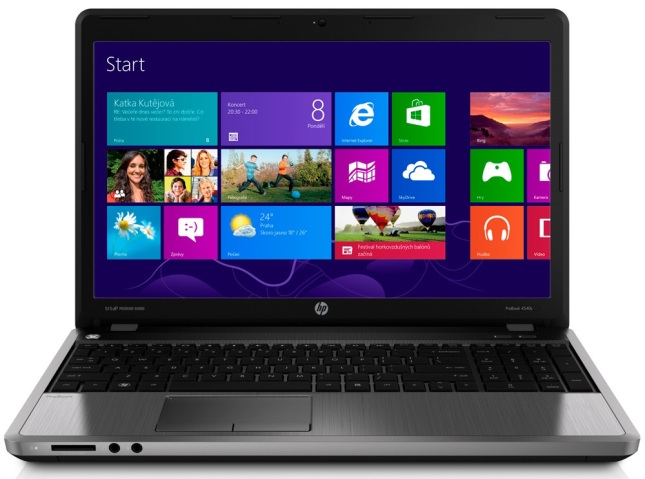
I received a new HP ProBook 4540s today. I needed to image it to our business standard image. I placed the CD in the drive to boot but it just kept on booting into the OEM Windows install. After many curse words and much grinding of teeth, I found a solution:

  1. When the laptop is at the initial HP log screen, press the ESC key
  2. Wait for the menu to appear and then press F10
  3. Select “Log in as a guest user”
  4. Choose “System Configuration”
  5. Expand the “Boot Options” option and scroll down and un-tick the “Secureboot” option.
  6. You then just have to choose ‘UEFI Hybrid (with CSM)’ or ‘Legacy’  under ‘Boot Mode’.

Save these options and exit and your laptop will now boot from the CD/DVD ROM drive.

HP ProBook 4540s

 
2 Comments

Posted by on February 14, 2013 in BIOS, Laptops / Notebooks


How to remove the users “Documents” folder from Windows 7 desktop

If you find that all your new users have a documents folder on your desktop, but you want them all to store their files on a server, you can remove the folder from view.

To do this, perform the following:

  • Run REGEDIT.exe
  • Navigate to HKEY_LOCAL_MACHINE\Software\Microsoft\Windows\CurrentVersion\Explorer\HideDesktopIcons\ClassicStartMenu\
  • Find this key: {59031a47-3f72-44a7-89c5-5595fe6b30ee} and change the value to ‘1’. If this key does not exist, just create a new DWORD key.

If you do not use the classic start menu, navigate to the NewStartPanel key and change the same value to ‘1’.

 
Leave a comment

Posted by on February 7, 2013 in Registry, Windows 7


How to push printers to Windows XP clients via Group Policy

If you are like me, you have been using the Print Management and Group Policy options in Server 2008 to push printer installs to all your Windows 7 clients. This is great and works well.

But, what happens if you still have Windows XP clients in your domain? Well, help is at hand with a Microsoft utility called PushPrinterConnections.exe which is found in the the C:\Windows\System32 directory on your server.

Here is how to push printer connections via Group Policy to your XP clients.

First, copy the PushPrinterConnections.exe file from the System32 directory on your server to your Desktop. Then follow these instructions:

  1. Open the GPMC.
  2. In the GPMC console tree, navigate to the domain or organizational unit (OU) that stores the computer or user accounts where you want to deploy the PushPrinterConections.exe utility.
  3. Right-click the GPO that contains the printer connections that you want to deploy using Group Policy, and then click Edit.
  4. Navigate to one of the following locations:
    • If the printer connections are deployed per-computer, go to Computer ConfigurationPoliciesWindows SettingsScripts (Startup/Shutdown).
    • If the printer connections are deployed per-user, go to User ConfigurationPoliciesWindows SettingsScripts (Logon/Logoff).
  5. Right-click Startup or Logon, and then click Properties.
  6. In the Startup Properties or Logon Properties dialog box, click Show Files. The Startup or Logon window appears.
  7. Copy the PushPrinterConnections.exe file from the %WINDIR%\System32 folder to the Startup or Logon window. This adds the utility to the GPO, where it will replicate to the other domain controllers with the Group Policy settings.
  8. In the Startup Properties or Logon Properties dialog box, click Add. The Add Script dialog box appears.
  9. In the Script Name box, type: PushPrinterConnections.exe
  10. To enable logging on client computers running Windows Server 2003, Windows XP, or Windows 2000, in the Script Parameters box, type: –logLog files are written to %WINDIR%\temp\ppcMachine.log (for per-computer connections) and to %temp%\ppcUser.log (for per-user connections) on the computer where the policy is applied.
  11. In the Add Script dialog box, click OK.
  12. In the Startup Properties or Logon Properties dialog box, click OK.
  13. Use GPMC to link the GPO to other OUs or domains to which you want to deploy the PushPrinterConnections.exe utility.
 

How to connect a client computer to WSUS 2012

In previous iterations of Windows Server Update Services (WSUS), your group policy would point to your WSUS server with the following:

http://<server name>

eg: http://wsus

But now, with WSUS in server 2012, you have to specify the port number. The port number is 8530. So in your group policy, you would specify the following:

http://wsus:8530

eg: http://wsus:8530

Once you have refreshed your local group policy or allowed it to apply itself overtime, you will then be able to receive updates from your local WSUS 2012 server.


How to successfully install Windows Internal Database onto Server 2012

If you are like me and you have tried to install the Windows Internal Database as part of the WSUS role in Server 2012, you would have come across this error message after a while:


Of course, your first instinct is to reboot as suggested. After a reboot, um, it has not installed. You try and try again – same result. After a lot of cursing and swearing, a search using Google found a result. Try this:

  1. Open up your domain group policy editor.
  2. Navigate to the Default Domain Policy
  3. Navigate to Policies -> Windows Settings -> Security Settings -> Local Policy -> User Rights Assignment
  4. Find the “Log on as a service” policy and edit it.
  5. Click on “Add user or group” button.
  6. Add the following users: IIS_WPG, NETWORK, NETWORK SERVICE, SERVICE
  7. Got to your Server 2012 box and open an elevated command prompt.
  8. Type in: gpupdate /force. Wait for it to successfully complete
  9. Now try and install the WID or WSUS.

You should now have successfully completed the install.


Provider cannot be found. It may not be properly installed.

I installed a new Windows Server 2008 R2 and I hosted my own web server. All was going well until I tried to connect a virtual directory to an Access database driven site and I received this error:

Error 500: Provider cannot be found. It may not be properly installed.

After a short search, I found that I needed to enable 32bit applications on this 64bit OS.

The easiest way to do this is to follow these steps:

  1. Open IIS manager on your server
  2. Click on the Application Pools link in the left column
  3. Click on the application pool for your website
  4. Choose Advanced Settings from the right column
  5. One of the first options should state “Enable 32-bit applications”. By default it is set to FALSE. Change this to TRUE.

And that’s it. Simple aye!?

 
1 Comment

Posted by on November 19, 2012 in IIS, Server 2008


Second network adapter and TCP Offload

I have been having all fun and games trying to get a second NIC to work correctly using Microsoft Hyper V (core and full install). I could see the NIC and configure but the VM would not see the network.

I first thought that Hyper V didn’t like the brand of network card, so I ordered some others. But in the meantime, I have found a solution.

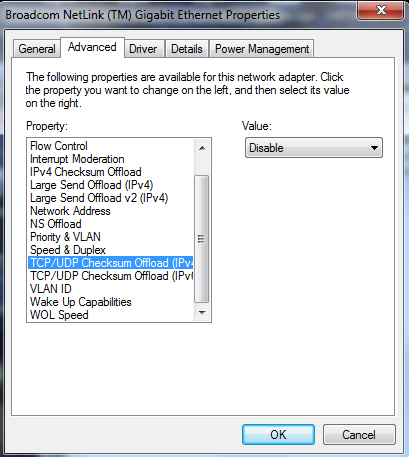
It comes down to an advanced NIC option – TCP Offload. This option is normally on by default on the NIC’s that I have seen. The TCP Offload is an option which was first used way-back-when PC’s were not as powerful as they are now. It would give the CPU a break from digesting network traffic and send it straight to the NIC. In this modern era, we do not need to do this any more. Also, disabling this option is supposed to assist in quicker network transfer speeds – we will see.

So how do you disable it? Open up your network card properties and click on the ADVANCED tab. The screen will look similar to this:

The 3 options that I disable are “IPv4 Checksum Offload”, “TCP Checksum Offload (IPv4)” and “TCP Checksum Offload (IPv6)”. Please note, the screen shot above has lumped in TCP and UDP together – that’s OK. Your network card driver may do a similar thing or separate them. Just disable TCP when you can.

Your VM’s will work like magic now.


Windows Server 2012 Unstable

Well I have been trying to install and run the new Windows Server 2012 recently, both in a virtual environment and a physical. But I am finding that it is very unstable.

There are two main areas that are causing my head to hurt:

  1. The new SERVER MANAGER seems to have a mind of it’s own. Sometimes it starts without a problem, other times it does not start at all. Very frustrating especially as this is where most of your work gets done in Server 2012
  2. Windows Update is really bad. Most of the time it just appears with a blank screen and if you close it down and try again, it does the same thing. Even when you shot down the server, it takes forever to do this as it is waiting on the update services to complete. I did manage to download a 170MB update for Server 2012 – hoping that this would solve my problem, but it did not.

Stay tuned for more Windows Server 2012 postings.

 
3 Comments

Posted by on November 2, 2012 in Server 2012